The RBNZ Divergence: NZD Resilience and the Emerging Market Liquidity Trap
The global forex landscape shifted on September 17, 2026, as a localized economic surprise in New Zealand collided with the immovable object of the Federal Reserve’s "higher-for-longer" monetary stance. The release of New Zealand’s Q2 GDP data—showing a robust 2.6% year-over-year growth against an expected 2.3%—has triggered a structural reassessment of central bank divergence.
While the Federal Reserve’s September 16 statement and projections have cemented a hawkish, data-dependent path for the US Dollar (DXY), the RBNZ’s resilience creates a counter-narrative. This report traces the cascading impact of this divergence, moving from the immediate currency repricing to the non-obvious liquidity drains currently undermining emerging market (EM) stability.
The Cascading Impact Chain
Layer 1: Direct Impacts (The NZD Catalyst)
The immediate market reaction was a sharp bid for the New Zealand Dollar (NZDUSD). The Q2 GDP print of +0.2% quarter-over-quarter (vs. +0.1% expected) and +2.6% year-over-year (vs. +2.3% expected) shattered the RBNZ’s "no growth" forecast. This data surprise effectively reduces the immediate pressure for aggressive monetary easing, forcing a repricing of the NZD yield curve. Consequently, we are seeing immediate volatility in the NZDUSD pair, with spillover effects into the AUDUSD, which is often traded as a proxy for Pacific-region growth.
The divergence between a resilient RBNZ and a hawkish Fed has fundamentally altered carry trade calculus. As NZD yields remain supported by domestic growth, the currency becomes an increasingly attractive destination for yield-seeking capital, particularly when funded by low-yielding currencies like the JPY. This is creating a "divergence squeeze," where the USDJPY is caught between the Fed’s rate stickiness and the sudden attractiveness of the NZD carry trade, forcing institutional desks to rebalance cross-currency books.
Layer 3: Macro Propagation (The Liquidity Vacuum)
The macro propagation is characterized by a global liquidity vacuum. As the Fed maintains a restrictive stance, US 2Y yields remain elevated. When combined with the NZD’s newfound resilience, capital is being drawn into a "yield-carry divergence." Investors are rotating away from high-beta assets (ES, NQ, RTY) into USD-denominated liquidity to hedge against the volatility of the Fed-RBNZ policy mismatch. This rotation is not merely an equity-to-cash move; it is a fundamental re-weighting of global risk exposure.
Layer 4: Non-Obvious Connections (The Carry-Trap)
The most critical, yet overlooked, development is the "Carry-Trap." As NZDUSD holds its value against the DXY, it is paradoxically triggering a liquidity drain in emerging markets like India (NIFTY). Institutional capital, seeking to maintain carry trade positions in the face of Fed hawkishness, is exiting higher-beta EM assets to cover USD-denominated margin calls. The NZD is effectively acting as a "safe yield" proxy, and its strength is inadvertently starving EM of the liquidity required to sustain their own equity and currency valuations.
Unified OCS Chart Read
Note: As of this report, OCS chart evidence for NZDUSD, AUDUSD, NQ, and RTY is deferred to the asynchronous enrichment queue. The following analysis is derived from order flow and macro-thematic positioning.
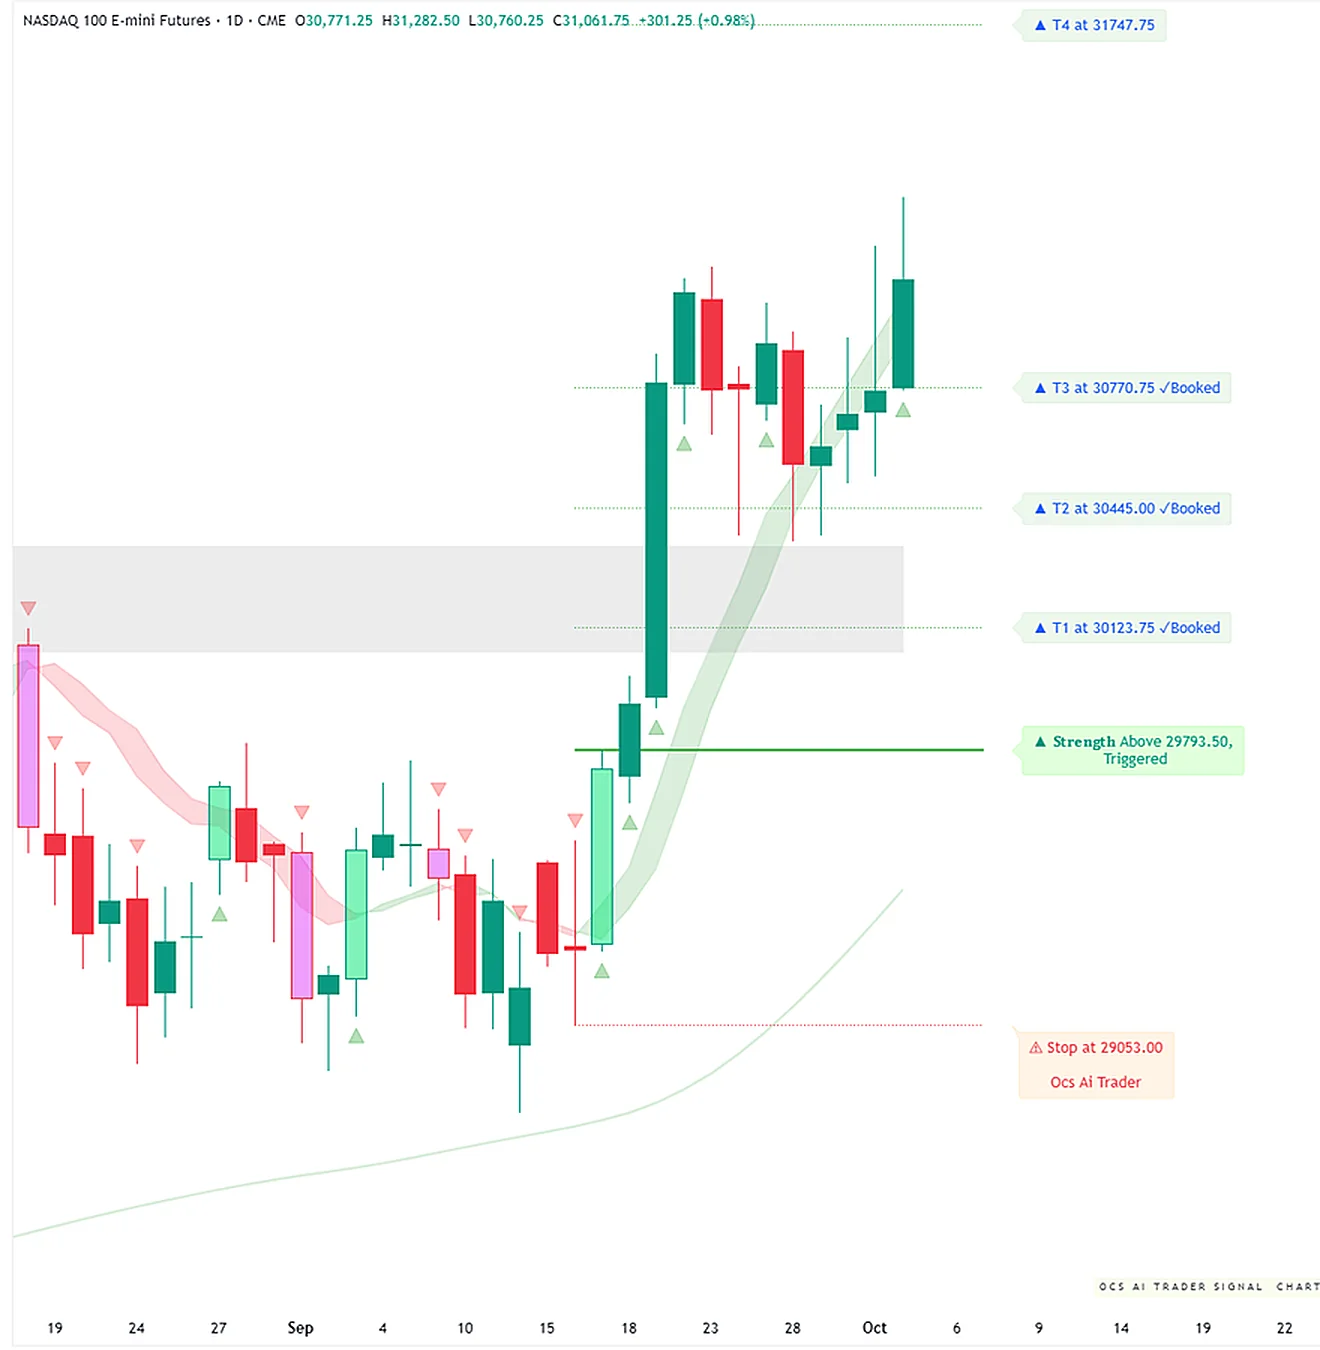
Setup Read: The current market environment is characterized by high-conviction directional bias in FX, juxtaposed with high-uncertainty volatility in equities.
NZDUSD: The technical setup suggests a breakout from recent consolidation ranges, but participants should watch for exhaustion at the 0.6200–0.6300 handle, where RBNZ intervention rhetoric may return to the fore.
NQ/RTY: These indices are currently exhibiting signs of "liquidity starvation." As capital migrates toward USD-denominated safe havens, the lack of depth in the equity order books makes them susceptible to sharp, gap-driven volatility.
Confirmation/Contradiction: The fundamental thesis (growth divergence) confirms the bullish bias for NZDUSD. However, if US 2Y yields spike significantly above current levels, the "Carry-Trap" could snap, leading to a violent deleveraging event that would contradict the current "resilience" narrative.
Security-by-Security Analysis
NZDUSD
Fig. 1 NZDUSD — Signals + Liquidity · open full sizeFig. 2 NZDUSD — Delta + Technical · open full sizeNZDUSD — Unified OCS chart read
Executive Summary
The consensus outlook is a bearish trend-continuation characterized by high conviction. While the primary 'Weakness Below' signal has already achieved three booked targets (Chart 1 — Signals + Liquidity), current participation remains driven by net selling CVD accumulation and negative liquidity bands sloping downward (Chart 2 — Delta + Technical). Price is currently navigating a rejection of an above-average float-volume zone (Chart 1 — Signals + Liquidity) while remaining below both fast and slow negative liquidity lines (Chart 2 — Delta + Technical).
OCS Confluence
Grade
Directional Bias
Participation State
high
bearish
exhausted
Setup Read: NZDUSD is currently navigating a post-extension phase, characterized by a bearish trend-continuation setup with high liquidity-delta alignment despite approaching exhaustion near upper volume zones.
Confirmations
Bearish trend-continuation bias confirmed by negative CVD pressure and net selling accumulation (Chart 2 — Delta + Technical).
Price action is currently navigating a secondary volume zone following a successful 'Weakness Below' signal (Chart 1 — Signals + Liquidity).
Downward momentum is supported by both bearish MACD crossovers (Chart 2 — Delta + Technical) and a green momentum strength band (Chart 1 — Signals + Liquidity).
Structural failure occurs if price breaches the 0.56946 invalidation level (Chart 1 — Signals + Liquidity).
Risk Notes
Exhaustion risk identified as price rejects the blue above-average float-volume zone (Chart 1 — Signals + Liquidity).
Low hands-off risk due to alignment of negative delta cycles and downward sloping liquidity lines (Chart 2 — Delta + Technical).
NZDUSD — Signals + Liquidity (click to expand)
Visible Context
Symbol
Timeframe
Layout Confidence
NZDUSD - New Zealand Dollar / U.S. Dollar
1D
high
Signal Engine
Direction
Declaration
Trigger
Trigger Status
Stop / Invalidation
SHORT
Weakness Below
0.59046
Triggered
0.56946
Target Ladder
T1
T2
T3
T4
T5
Booked
Next Unbooked
0.58773 (Booked)
0.58508 (Booked)
0.58229 (Booked)
0.57423
0.56946
T1, T2, T3
N/A
Structure Context
Float-Volume Zones
Momentum Band
Dominant Cycle
Price Location
Structural Context
Price is currently rejecting the blue above-average float-volume zone near 0.57400.
strength (price is trading within the green momentum strength band)
transition (pink ribbon flattening/shifting after steep bearish move)
Price is between T3 (booked) and T4 (unbooked), currently resting in a blue volume zone.
The setup shows high historical completion with three booked targets, currently navigating a secondary volume zone.
Setup Read
State
R:R to T1
R:R to Furthest
Invalidation
Evidence Quality
Notes
exhausted
N/A
N/A
Stop at 0.56946
high
Price is currently rejecting the blue above-average float-volume zone while inside the green momentum strength band, following a Weakness Below declaration that has already achieved multiple targets.
NZDUSD — Delta + Technical (click to expand)
OCS Layout Presence
Delta Configuration Badge
Delta Histogram / CVD
Liquidity Overlay / Cycle
Ocs Ai Trader | Delta Configuration
Red CVD columns indicating net selling accumulation and red delta-force arrows at the bottom of the cycle.
Visible pink/purple negative liquidity band and stepped negative liquidity lines.
Liquidity Engine
Active Band
Vs Slow Liquidity
Vs Fast Liquidity
Cycle State
Divergence
Hands-Off Risk
negative
below slow negative line
below fast negative line
fast and slow lines are both negative and sloping downward
none
low
Delta Engine
CVD Pressure
Dominant Cycle Leader
Adaptive Filter
Delta Force
Exhaustion Boundary
net selling
negative
bearish ceiling
absent
none
Secondary TA
EMA
RSI
MACD
EMA 5 and EMA 21 are visible
N/A
MACD is visible and showing a bearish crossover/momentum
Confluence
Setup Type
Directional Bias
Conviction
Confirmation
Contradiction
Key Level
trend-continuation short
bearish
high
Price is currently trending within a negative liquidity band and below both fast and slow negative liquidity lines, aligning with the negative delta cycle and selling CVD accumulation.
None visible.
0.57800 (recent support/liquidity floor area)
* **Thesis:** The primary beneficiary of the Q2 GDP surprise.
* **Analysis:** The 2.6% y/y growth print provides the RBNZ with the breathing room to maintain a restrictive policy stance, creating a yield spread advantage over the Fed.
* **Levels to Watch:** Support at 0.6050; resistance at 0.6250.
* **Risk:** A sudden shift in global risk appetite that forces a broad "flight to safety" into the USD, overriding the RBNZ yield advantage.
AUDUSD
Fig. 3 AUDUSD — Signals + Liquidity · open full sizeFig. 4 AUDUSD — Delta + Technical · open full sizeAUDUSD — Unified OCS chart read
Executive Summary
The AUDUSD structure is currently in a state of transition. While Chart 1 — Signals + Liquidity notes that the initial downside 'Weakness Below' signal has already realized four major targets (T1-T4) and is now in an 'exhausted' state, Chart 2 — Delta + Technical reveals active net buying accumulation and positive liquidity alignment. The current environment suggests a shift from a completed bearish cycle to a potential trend-continuation long phase, supported by positive CVD pressure.
OCS Confluence
Grade
Directional Bias
Participation State
medium
bullish
active
Setup Read: AUDUSD is navigating a transition from an exhausted bearish move into a potential bullish trend-continuation characterized by positive delta accumulation and liquidity alignment above previous weakness triggers.
Confirmations
Chart 1 identifies price navigating upper momentum bands while Chart 2 shows net buying accumulation via green CVD columns.
Both charts suggest a shift from previous downward momentum toward a stabilized or positive state.
Price location above the 0.71551 trigger (Chart 1) aligns with the positive liquidity band and positive cycle (Chart 2).
Contradictions
Chart 1 declares a 'SHORT' weakness signal with multiple targets already booked, whereas Chart 2 presents a 'bullish' trend-continuation long setup with high conviction.
Structural failure is defined by a breach of the 0.71551 trigger level (Chart 1) or loss of the positive liquidity band (Chart 2).
Risk Notes
Setup is considered 'crowded' as most downside targets from the original signal have been realized (Chart 1).
Potential for price stabilization or chop within the upper momentum band (Chart 1).
Conflict between historical bearish signal structure and current bullish delta flow requires cautious observation.
AUDUSD — Signals + Liquidity (click to expand)
Visible Context
Symbol
Timeframe
Layout Confidence
AUDUSD
1D
high
Signal Engine
Direction
Declaration
Trigger
Trigger Status
Stop / Invalidation
SHORT
Weakness Below
0.71551
Triggered
0.71551
Target Ladder
T1
T2
T3
T4
T5
Booked
Next Unbooked
0.71183 (Booked)
0.70824 (Booked)
0.70461 (Booked)
0.69570 (Booked)
N/A
T1, T2, T3, T4
N/A
Structure Context
Float-Volume Zones
Momentum Band
Dominant Cycle
Price Location
Structural Context
Price is currently in open space above the gray average float-volume reference zone.
strength
transition
Price is currently trading above the trigger of 0.71551 and above all previously booked targets.
The setup is crowded as the recent price action has already realized multiple downside targets from the initial weakness declaration.
Setup Read
State
R:R to T1
R:R to Furthest
Invalidation
Evidence Quality
Notes
exhausted
N/A
N/A
stop at 0.71551
high
The recent upward movement has completed multiple targets and is currently navigating a period of price stabilization within the upper momentum band.
AUDUSD — Delta + Technical (click to expand)
OCS Layout Presence
Delta Configuration Badge
Delta Histogram / CVD
Liquidity Overlay / Cycle
Ocs Ai Trader | Delta Configuration
Green CVD columns indicating net buying accumulation and a positive dominant cycle.
Positive liquidity band and stepped liquidity lines visible on the price chart.
Liquidity Engine
Active Band
Vs Slow Liquidity
Vs Fast Liquidity
Cycle State
Divergence
Hands-Off Risk
positive
above
above
alignment
none
low
Delta Engine
CVD Pressure
Dominant Cycle Leader
Adaptive Filter
Delta Force
Exhaustion Boundary
net buying
positive
N/A
absent
none
Secondary TA
EMA
RSI
MACD
EMA 50 at 0.71374, EMA 200 at 0.71405
RSI 14 close 41.89 51.49
MACD 12 26 9 -0.00172 0.00006 0.00269
Confluence
Setup Type
Directional Bias
Conviction
Confirmation
Contradiction
Key Level
trend-continuation long
bullish
high
Price is trading within a positive liquidity band with a positive dominant cycle and green CVD columns indicating net buying accumulation.
None visible.
0.7140
* **Thesis:** The "Commodity Cousin" playing catch-up.
* **Analysis:** While AUDUSD benefits from the general Pacific-region growth sentiment, it is hampered by the decoupling of industrial metals (HG) from the NZDUSD. The AUD remains tethered to global industrial demand, which is currently cooling.
* **Levels to Watch:** Support at 0.6600; resistance at 0.6800.
* **Risk:** Decoupling from NZDUSD if the growth surprise remains isolated to New Zealand.
USDJPY
Fig. 5 USDJPY — Signals + Liquidity · open full sizeFig. 6 USDJPY — Delta + Technical · open full sizeUSDJPY — Unified OCS chart read
Executive Summary
The unified read indicates a bearish tilt characterized by high-conviction delta selling and liquidity alignment, despite a formal LONG declaration from the signal engine. While Chart 1 — Signals + Liquidity notes a 'Strength Above' trigger at 155.236, price is currently trapped in a weakness band and trading below that level. Chart 2 — Delta + Technical provides the decisive weight, showing synchronized bearish alignment across negative liquidity bands, net selling CVD, and bearish momentum oscillators.
OCS Confluence
Grade
Directional Bias
Participation State
medium
bearish
unclear
Setup Read: USDJPY presents a conflicting structural setup where a formal long trigger is being countered by aggressive bearish delta and negative liquidity alignment.
Confirmations
Price is trading within a momentum weakness band (Chart 1) aligned with bearish RSI and MACD momentum (Chart 2).
Current price action is located below the Signal Engine trigger of 155.236 (Chart 1) and below both fast and slow negative liquidity lines (Chart 2).
Bearish delta-force arrows and net selling CVD (Chart 2) corroborate the 'weakness' momentum band and declining ribbon profile (Chart 1).
Contradictions
Chart 1 identifies a 'Strength Above' LONG declaration at 155.236, whereas Chart 2 identifies a high-conviction trend-continuation SHORT bias near 155.500.
Levels To Watch
155.236 (Signal Trigger - Chart 1)
155.500 (Key Short Level/Liquidity Bottom - Chart 2)
156.765 (Next Unbooked Long Target - Chart 1)
154.096 (Stop/Invalidation - Chart 1)
Invalidation
Structural failure occurs if price breaches the stop level at 154.096 (Chart 1).
Risk Notes
Conflicting signals between the Signal Engine (Long) and Delta Engine (Short).
Price is currently in an 'unclear' state, trading between the long trigger and the long stop level.
Potential for chop while price oscillates between the 155.236 trigger and the 155.500 liquidity zone.
USDJPY — Signals + Liquidity (click to expand)
Visible Context
Symbol
Timeframe
Layout Confidence
USDJPY / Japanese Yen - 1D
1D
high
Signal Engine
Direction
Declaration
Trigger
Trigger Status
Stop / Invalidation
LONG
Strength Above
155.236
Triggered
154.096
Target Ladder
T1
T2
T3
T4
T5
Booked
Next Unbooked
155.751 (Booked)
156.249 (Booked)
156.765
158.272
N/A
T1, T2
T3 at 156.765
Structure Context
Float-Volume Zones
Momentum Band
Dominant Cycle
Price Location
Structural Context
Price is currently rejecting a red extreme float-volume zone near 163.500 and is trading below the blue secondary zone.
weakness (price is trading within the pink weakness band)
transition (flattening/descending ribbon profile following recent weakness)
Price is below the trigger (155.236) and current levels, between the stop (154.096) and the next unbooked target (156.765).
The setup is conflicting as the Strength Above declaration is being countered by current price action within a weakness momentum band and below the trigger level.
Setup Read
State
R:R to T1
R:R to Furthest
Invalidation
Evidence Quality
Notes
unclear
N/A
N/A
Price breaching the stop level at 154.096
high
Price is currently rejecting a red extreme float-volume zone and trading within a pink weakness momentum band, following a recent decline from previous targets.
USDJPY — Delta + Technical (click to expand)
OCS Layout Presence
Delta Configuration Badge
Delta Histogram / CVD
Liquidity Overlay / Cycle
Ocs Ai Trader | Delta Configuration badge visible near the center-left of the chart
Green and red CVD columns visible at the bottom, with a recent series of red columns and red delta-force arrows below the zero line
Visible pink/red negative liquidity bands and blue/green liquidity lines overlaid on the price action
Liquidity Engine
Active Band
Vs Slow Liquidity
Vs Fast Liquidity
Cycle State
Divergence
Hands-Off Risk
negative liquidity band; price is at the bottom of the recent decline near 155.500
below slow negative liquidity line
below fast negative liquidity line
fast and slow negative liquidity lines are aligned downward
none
low; price, liquidity bands, and delta cycles are in synchronized bearish alignment
MACD visible; shows bearish momentum with histogram below zero
Confluence
Setup Type
Directional Bias
Conviction
Confirmation
Contradiction
Key Level
trend-continuation short
bearish
high
Negative liquidity band is active with price trading below both fast and slow negative liquidity lines, aligned with net selling accumulation in the CVD columns.
None visible
155.500
* **Thesis:** The carry-trade funding mechanism under pressure.
* **Analysis:** The USDJPY is currently the epicenter of the carry trade unwind. As NZD yield attractiveness increases, the JPY is being sold to fund positions elsewhere, putting upward pressure on the pair despite the Fed’s hawkishness.
* **Levels to Watch:** 148.50 (support), 152.00 (resistance).
* **Risk:** Intervention risk remains high. Any sign of BoJ tightening will cause a violent reversal.
NQ / RTY
Fig. 7 RTY — Signals + Liquidity · open full sizeFig. 8 RTY — Delta + Technical · open full sizeRTY — Unified OCS chart read
Executive Summary
The consensus view for RTY is a bearish trend-continuation state. While the Signal Engine (Chart 1) notes the move is currently in an 'exhausted' state having already booked T1 and T2, the Delta Engine (Chart 2) confirms active net selling and price testing recent lows within a negative liquidity band. The primary tension exists between the completed downside move of Chart 1 and the ongoing negative delta pressure observed in Chart 2.
OCS Confluence
Grade
Directional Bias
Participation State
medium
bearish
exhausted
Setup Read: RTY displays a bearish trend-continuation setup characterized by negative liquidity and net selling, though the move is currently approaching an exhausted state following the booking of primary targets.
Confirmations
Bearish momentum alignment: Chart 1 confirms price is within a pink weakness band, while Chart 2 corroborates via negative delta-force arrows and net selling CVD pressure.
Structural downside: Chart 1 identifies price in open space below the average float-volume zone, matching Chart 2's observation of price trading below both slow and fast negative liquidity lines.
Trend state: Both analyses identify a bearish regime, with Chart 1 citing a bearish ribbon and Chart 2 noting a bearish ceiling and negative delta cycle.
Contradictions
(none)
Levels To Watch
2913.3 (Trigger - Chart 1)
2896.0 (Key Confluence Level - Chart 2)
2857.7 (Booked Target T1 - Chart 1)
2849.6 (Catastrophic Stop/T3 - Chart 1)
Recent Lows (Immediate Liquidity Support - Chart 2)
Invalidation
The structural failure or catastrophic stop is defined by a move above 2849.6 (Chart 1).
Risk Notes
Exhaustion risk: Chart 1 labels the current setup as exhausted after hitting multiple targets.
Liquidity support: Chart 2 indicates medium hands-off risk as price tests immediate short-term liquidity support.
Tangle cycle: Chart 2 notes a 'tangle' cycle state, suggesting potential for non-linear movement.
RTY — Signals + Liquidity (click to expand)
Visible Context
Symbol
Timeframe
Layout Confidence
RTY1! E-Mini Russell 2000 Index Futures · 1D · CME
1D
high
Signal Engine
Direction
Declaration
Trigger
Trigger Status
Stop / Invalidation
SHORT
Weakness Below
2913.3
Triggered
2849.6
Target Ladder
T1
T2
T3
T4
T5
Booked
Next Unbooked
2857.7 (Booked)
2837.2 (Booked)
2849.6
N/A
N/A
T1, T2
N/A
Structure Context
Float-Volume Zones
Momentum Band
Dominant Cycle
Price Location
Structural Context
Price is currently in open space below the gray average float-volume/order-block reference zone.
weakness (price is within the pink weakness band)
bearish (pink ribbon below price)
Price is below the trigger (2913.3), below booked targets, and above the catastrophic stop (2849.6).
The setup shows a completed downside move with multiple targets booked and price currently in a weakness regime.
Setup Read
State
R:R to T1
R:R to Furthest
Invalidation
Evidence Quality
Notes
exhausted
N/A
N/A
Stop at 2849.6
high
Price is currently in a weakness regime, trading below the trigger and within a pink momentum band, having recently booked T1 and T2 targets.
RTY — Delta + Technical (click to expand)
OCS Layout Presence
Delta Configuration Badge
Delta Histogram / CVD
Liquidity Overlay / Cycle
Ocs Ai Trader | Delta Configuration badge is visible in the center of the chart
Visible CVD columns (green/red) and red delta-force arrows at the bottom panel
Visible pink liquidity bands and stepped liquidity lines overlaid on price
Liquidity Engine
Active Band
Vs Slow Liquidity
Vs Fast Liquidity
Cycle State
Divergence
Hands-Off Risk
negative liquidity band with price testing recent lows
below slow negative liquidity line
below fast negative liquidity line
tangle
none
medium due to price testing immediate short-term liquidity support
Delta Engine
CVD Pressure
Dominant Cycle Leader
Adaptive Filter
Delta Force
Exhaustion Boundary
net selling
negative
bearish ceiling
recent red arrows
none
Secondary TA
EMA
RSI
MACD
EMA 9 and EMA 21 visible on price chart
RSI visible in bottom panel
MACD visible in bottom panel
Confluence
Setup Type
Directional Bias
Conviction
Confirmation
Contradiction
Key Level
trend-continuation short
bearish
medium
The price is currently within a negative liquidity band supported by recent red delta-force markers and negative CVD accumulation.
None visible.
2,896.0
* **Thesis:** Liquidity victims of the Fed-RBNZ divergence.
* **Analysis:** The "higher-for-longer" Fed outlook, combined with the capital migration toward USD-denominated liquidity, is compressing equity multiples. RTY (small-caps) is particularly vulnerable due to a lack of balance sheet strength to absorb higher discount rates.
* **Levels to Watch:** NQ support at 19,500; RTY support at 2,100.
* **Risk:** If the "Carry-Trap" leads to a broader liquidity drain, these indices will see accelerated selling pressure.
NIFTY / USDINR
Fig. 9 NIFTY — Signals + Liquidity · open full sizeFig. 10 NIFTY — Delta + Technical · open full sizeNIFTY — Unified OCS chart read
Executive Summary
The NIFTY exhibits strong bearish momentum following a successful 'Weakness Below' trigger at 24311.00 (Chart 1 — Signals + Liquidity). Price has transitioned into a momentum-driven decline, having already cleared all five declared target levels (Chart 1). While momentum is high, secondary technicals from Chart 2 — Delta + Technical show RSI at 27.91, suggesting the move is approaching extreme oversold territory.
OCS Confluence
Grade
Directional Bias
Participation State
medium
bearish
active
Setup Read: NIFTY is currently in a momentum-driven bearish phase, trading below historical targets and key volume zones with high conviction but approaching oversold technical boundaries.
Confirmations
Consensus bearish momentum: Chart 1 identifies a pink momentum weakness band, while Chart 2 shows a highly oversold RSI (27.91) and negative MACD.
Structural breakdown: Chart 1 shows price trading in open space below all primary targets and volume zones, supported by Chart 2's EMA 5/20 convergence at 23496.85.
Structural failure occurs if price breaches the declared stop at 24051.00 (Chart 1 — Signals + Liquidity).
Risk Notes
High risk of exhaustion due to RSI 14 approaching extreme lows (Chart 2)
Hands-off risk noted due to missing OCS liquidity and delta engine components in current layout (Chart 2)
NIFTY — Signals + Liquidity (click to expand)
Visible Context
Symbol
Timeframe
Layout Confidence
NIFTY - Nifty 50 Index
1D
high
Signal Engine
Direction
Declaration
Trigger
Trigger Status
Stop / Invalidation
SHORT
Weakness Below
24311.00
Triggered
24051.00
Target Ladder
T1
T2
T3
T4
T5
Booked
Next Unbooked
24257.75 (Booked)
24055.55 (Booked)
24152.76 (Booked)
23994.00 (Booked)
23857.15 (Booked)
T1, T2, T3, T4, T5
N/A
Structure Context
Float-Volume Zones
Momentum Band
Dominant Cycle
Price Location
Structural Context
Price is currently in open space below the pink extreme volume zone and the blue secondary order block.
weakness; price is trading within the pink momentum weakness band
bearish; pink ribbon is expanding and driving price downward
Price at 23217.00 is below the trigger, all targets, and the stop.
The setup shows high confluence with all declared targets already marked as booked and price currently in a momentum-driven decline.
Setup Read
State
R:R to T1
R:R to Furthest
Invalidation
Evidence Quality
Notes
active
N/A
N/A
Stop at 24051.00
high
The current price is below the declared Weakness Below trigger, moving through the pink weakness band and exiting the primary pink extreme volume zone.
NIFTY — Delta + Technical (click to expand)
OCS Layout Presence
Delta Configuration Badge
Delta Histogram / CVD
Liquidity Overlay / Cycle
Ocs Ai Trader | Delta Configuration
N/A
N/A
Liquidity Engine
Active Band
Vs Slow Liquidity
Vs Fast Liquidity
Cycle State
Divergence
Hands-Off Risk
N/A
N/A
N/A
N/A
N/A
high due to missing OCS liquidity and delta engine components
Delta Engine
CVD Pressure
Dominant Cycle Leader
Adaptive Filter
Delta Force
Exhaustion Boundary
N/A
N/A
N/A
N/A
N/A
Secondary TA
EMA
RSI
MACD
EMA 5: 23496.85, EMA 20: 23496.85
RSI 14 close: 27.91, 34.50
MACD 12 26 9: -254.38, -166.65
Confluence
Setup Type
Directional Bias
Conviction
Confirmation
Contradiction
Key Level
N/A
N/A
N/A
N/A
N/A
N/A
* **Thesis:** Collateral damage in the liquidity drain.
* **Analysis:** The NIFTY is suffering from the "Carry-Trap." As institutional capital exits to cover USD-denominated margin calls, the NIFTY is experiencing a structural liquidity drain. The USDINR is consequently under pressure as capital repatriation accelerates.
* **Risk:** Persistent outflows could lead to a breach of critical support levels in the Indian equity markets.
Historical Parallels
The current environment mirrors the "Divergence Cycle" of 2014-2015, where the Federal Reserve initiated a tapering cycle while other central banks (notably the RBNZ) maintained a hawkish bias due to domestic commodity resilience. In that period, the initial reaction was a surge in the commodity-linked currencies, followed by a violent "liquidity snapback" that eventually forced all central banks to align with the Fed’s tightening trajectory. Investors should note that "divergence" is rarely a permanent state; it is usually a transition period leading to eventual global synchronization.
Outlook & Risk Matrix
Short-Term (1-5 Days)
Scenario (Bullish NZD): Continued digestion of the GDP data, with NZDUSD testing upper resistance levels.
Scenario (Bearish/Correction): A hawkish surprise in US labor or inflation data re-asserts the DXY dominance, forcing a rapid unwind of the NZD carry trade.
Medium-Term (1-4 Weeks)
Base Case: The "Carry-Trap" persists. NZDUSD remains elevated, but the liquidity drain on EM and high-beta equities intensifies, leading to increased volatility in indices (NQ/RTY).
Risk Matrix:
High Risk: Sudden liquidity event in EM leading to contagious selling in US equities.
Medium Risk: RBNZ pivots to a more dovish tone to protect exporters from margin compression (the "masked stagflation" effect).
Low Risk: Global growth synchronizes, reducing the divergence trade entirely.
What to Watch
US 2Y Yields: If these break significantly above recent ranges, the "higher-for-longer" narrative will overwhelm the NZD growth story.
RBNZ Rhetoric: Watch for any signaling that the central bank is concerned about the currency's impact on export competitiveness.
EM Liquidity Metrics: Monitor NIFTY volume and USDINR volatility as proxies for the "Carry-Trap" liquidity drain.
Energy Prices (WTI/BRENT): While the forex focus is high, watch energy prices as a tax on NZ exporters—if input costs rise while the currency strengthens, the "growth" narrative will quickly turn into a "margin squeeze" narrative.
Education and market research only, not financial advice. Charts are OCS AI Trader readings at the time of writing and change with new bars.