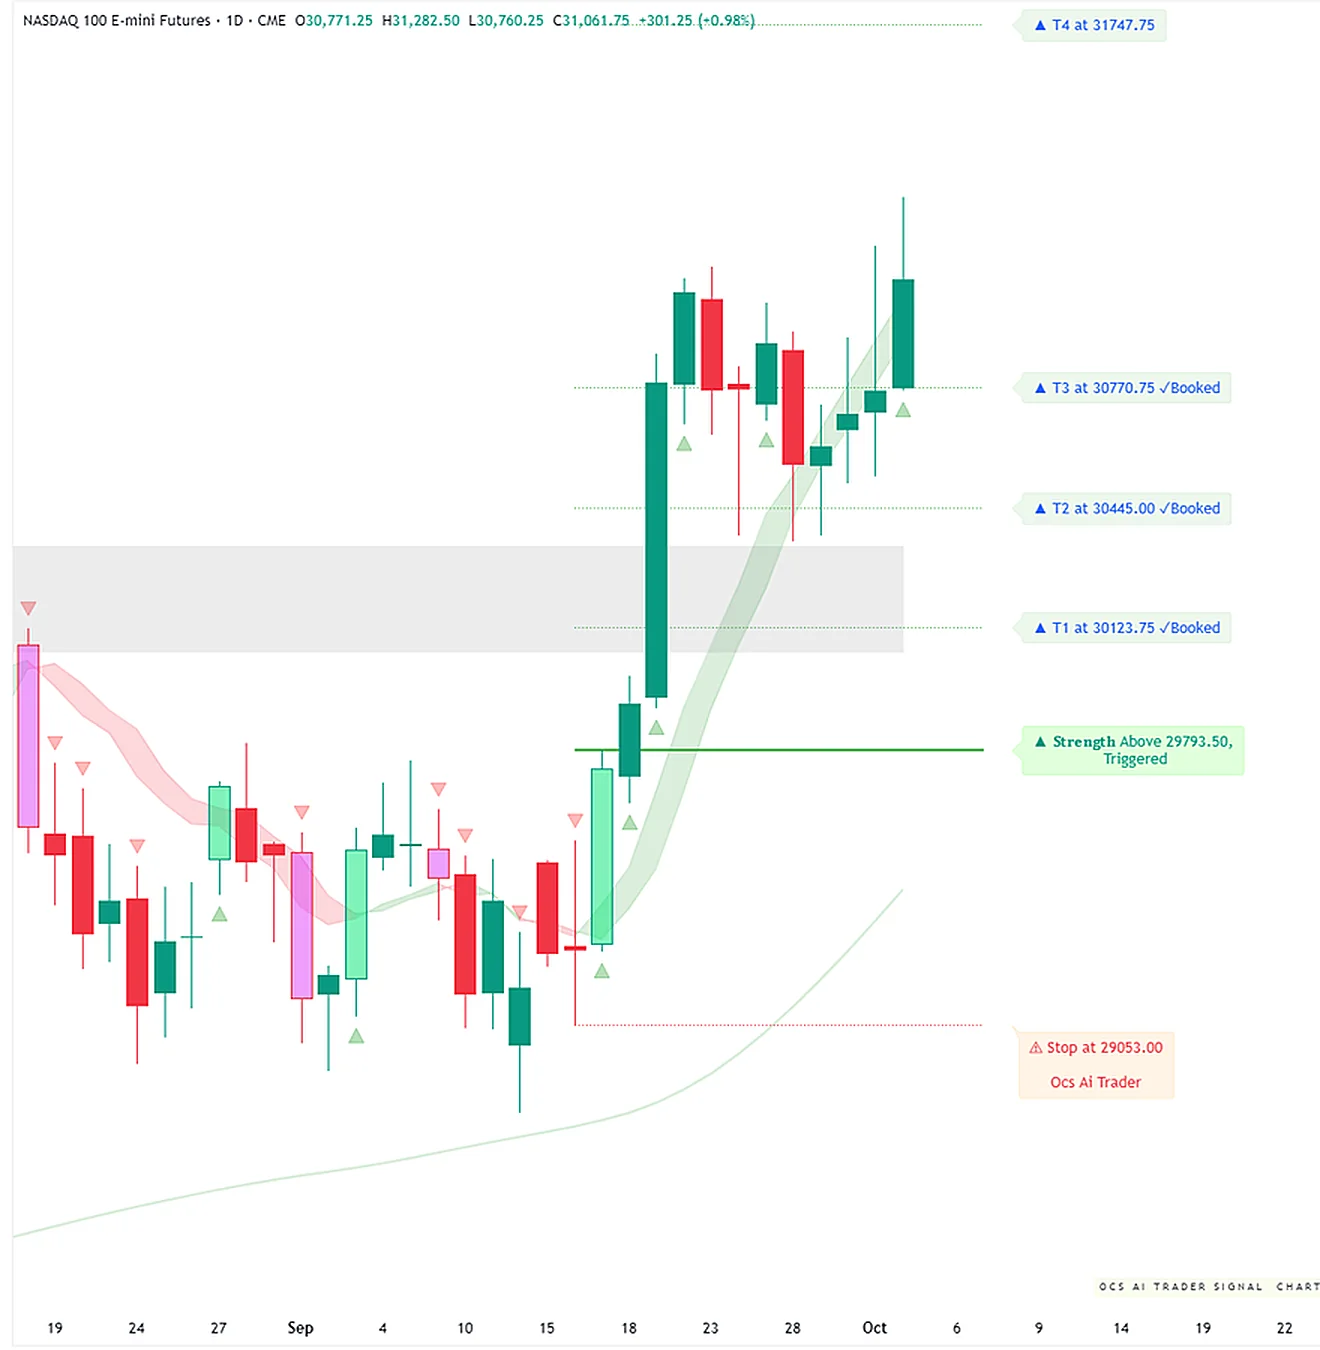
The Great Carry Unwind: JPY Intervention Triggers Global Liquidity Vacuum
Executive summary
The global macro landscape shifted violently on June 3, 2026, as aggressive Japanese Ministry of Finance (MoF) and Bank of Japan (BoJ) intervention catalyzed a systemic unwinding of Yen-funded carry trades. This event is not merely a currency fluctuation; it is a liquidity-draining event that is propagating through four distinct layers of the global financial architecture. The immediate impact—a spike in USDJPY volatility—is forcing a cascading liquidation of high-beta assets and leveraged growth positions, effectively ending the "risk-on" complacency that characterized the Q2 rally. We are witnessing a classic "liquidity vacuum" where the scramble for Yen to cover margin calls is forcing the sale of high-yielding commodity currencies and over-leveraged tech equity, creating a synchronized deleveraging event.
The Layered Impact Analysis: From Intervention to Systemic Reset
Layer 1: Direct Impacts (The Trigger)
The primary mechanism is a forced, rapid repricing of the Yen (JPY) driven by direct central bank intervention. This is the "Ground Zero" of the current market volatility.
USDJPY Volatility: The immediate effect is a violent contraction in USDJPY, effectively breaking the 150-level support floor and triggering algorithmic stop-losses.
Carry Trade Liquidation: The most direct victims are the cross-yen pairs (GBPJPY, EURJPY). Institutional desks that were "short JPY / long higher-yielding currencies" are being forced to close positions instantly to meet margin requirements.
Asset Price Action: We are seeing a direct flight to safety (GLD, TLT) as the market suddenly discounts the "easy money" regime that funded the Q2 tech rally.
Layer 2: Secondary Effects (The Ripple)
As the carry trade unwinds, the contagion spreads to the broader liquidity pool.
Liquidity Drain in High-Beta: The "ATM" of the global carry trade—commodity currencies like AUD and NZD—are facing massive selling pressure. These are not being sold due to local macro deterioration, but because they are the most liquid assets available for liquidation to fund JPY repatriation.
Sector Rotation: The high-multiple tech sector (XLK), which has been the primary beneficiary of low-volatility, low-cost capital, is facing a "cost of capital" shock. As the cost of Yen-denominated debt rises, the valuation models for high-growth tech are being re-rated, leading to a rotation into defensive sectors.
Credit Spread Widening: HYG (High Yield) is beginning to show signs of stress. The reduction in global liquidity is increasing the risk premium on corporate debt, as the market begins to price in a "sudden stop" in credit availability.
Layer 3: Macro Propagation (The Ripple)
The carry trade collapse is now forcing a broader reassessment of global financial conditions.
European Cross-Rate Crunch: The forced liquidation of EURJPY is spilling over into EURUSD, creating a volatility spike in European pairs that is decoupled from local economic data. The ECB is now facing a "currency-induced tightening" that they did not initiate.
Emerging Market (EM) Stress: The "Sudden Stop" hypothesis is moving from theory to reality. Capital is fleeing EM debt to return to the safety of USD and CHF, creating a liquidity crisis in non-G10 markets.
The Yield Curve Hedge: Investors are rotating into long-duration US Treasuries (TLT) as a hedge against a global growth slowdown. This is breaking the correlation between stocks and bonds, as TLT acts as the ultimate "risk-off" beneficiary.
Layer 4: Non-Obvious Connections (The Alpha)
This is where the true systemic risk lies—the connections that the consensus is missing.
The 'Defensive Importer' Paradox: While the broader Japanese equity market (EWJ) is suffering due to the export-heavy nature of its indices, domestic Japanese consumer staples (XLP-proxies) are decoupling. They benefit from the rapid JPY appreciation (lower input costs) and are becoming the only local hedge for Japanese capital, creating a bifurcated Japanese market.
The 'Double-Short' AUDUSD: AUDUSD is currently the most dangerous pair in the G10. It is a "double-short": it loses liquidity due to the carry-unwind (L2) and loses demand due to the global growth-slowdown narrative (L3). Expect AUDUSD to collapse faster than other G10 pairs.
CHF as the 'Carry-Trade-Killer': USDCHF is becoming the primary volatility proxy. Because CHF is the only viable alternative funding currency to the JPY, the scramble for Yen is forcing a secondary scramble into CHF, making USDCHF movements increasingly erratic and decoupled from the DXY.
The Tech-Credit Feedback Loop: High-multiple tech (XLK) has been fueled by cheap, Yen-funded credit. As HYG spreads widen (L2/L3), the "growth" narrative in tech is not just rotating; it is being fundamentally repriced. This is a permanent valuation reset, not a dip-buying opportunity.
Security-by-Security Analysis
XLK (Technology Select Sector SPDR)
Status: Overextended & Vulnerable.
Analysis: With an RSI of 83.67, XLK is in extreme overbought territory. The current price of $198.21 masks the internal rot caused by the carry trade unwind. The "liquidity vacuum" is hitting the most liquid, high-multiple names first.
Trade: The options chain reveals a massive skew toward calls, but the put-side liquidity is drying up. We are looking for a mean reversion to the 20-day SMA ($179.59). The "Tech-Credit Feedback Loop" suggests that if HYG spreads continue to widen, XLK will face a structural drawdown, not a cyclical one.
The consensus outlook for USDJPY is Neutral with low conviction. Both Chart 1 — Signals + Liquidity and Chart 2 — Delta + Technical indicate that actionable data is unavailable due to symbol errors, rendering both the liquidity tracker and technical indicators unreadable.
Consensus Verdict
Final Bias
Conviction
Key Action
Neutral
low
Wait for valid data synchronization and signal generation before attempting to establish a position.
Reason: Technical analysis is currently impossible as both sources report a failure to load symbol data.
Where the charts agree
Chart 1 — Signals + Liquidity and Chart 2 — Delta + Technical both report a Neutral bias.
Both analysts report low conviction due to a complete absence of visible technical data or symbol errors.
Where the charts disagree
(none)
Key Levels to Watch
(none)
USDJPY — Signals + Liquidity (click to expand)
Trade Signal
Direction
Status
Trigger
T1
T2
T3
T4
T5
Stop
Booked
NEUTRAL
unclear
N/A
N/A
N/A
N/A
N/A
N/A
N/A
None
Price Snapshot
Current Price
Change
Trend
N/A
N/A
N/A
Risk Reward
R:R to T1
R:R to Furthest Target
N/A
N/A
Liquidity Tracker
Background Zone
Fast Line
Slow Line
Cross Signal
Extreme Reading
Price Divergence
N/A
N/A
N/A
none
N/A
none
Outlook
Bias
Conviction
Reason
Key Level to Watch
Neutral
low
The chart displays no data because the symbol does not exist, making both the trade plan and liquidity tracker unreadable.
N/A
USDJPY — Delta + Technical (click to expand)
Delta Configuration
Bias
Recent Signal
Volume Strength
Envelope Position
N/A
none visible
N/A
N/A
EMA (9 / 21)
EMA 9
EMA 21
Cross State
Price vs EMAs
N/A
N/A
N/A
N/A
RSI (14)
Current
Zone
Divergence
N/A
N/A
none
MACD (12, 26, 9)
Histogram
Signal Cross
Momentum
N/A
N/A
N/A
Confluence
Indicators Aligned
Dominant Direction
mixed
N/A
Outlook
Bias
Conviction
Reason
Key Level
Neutral
low
No technical data is visible as the chart displays an error message stating the symbol does not exist.
N/A
* **Status:** High Intervention Risk.
* **Analysis:** The pair is the primary driver of global volatility. Any move toward the 150 level is now effectively a "red line" for the MoF. The volatility is not just price action; it is the sound of a multi-trillion dollar carry trade breaking.
* **Trade:** Avoid directional bets. The "intervention-deflation" tail risk means that if the MoF forces a massive JPY move, it could trigger a global liquidity vacuum where even gold (GLD) sells off.
The consensus outlook for TLT is Bullish with medium conviction. Chart 1 — Signals + Liquidity confirms a successful long-trend execution with three targets already booked and a fresh bullish liquidity cross. This is corroborated by Chart 2 — Delta + Technical, which highlights bullish RSI divergence and accelerating MACD momentum.
Consensus Verdict
Final Bias
Conviction
Key Action
Bullish
medium
Observe for a sustained price reclaim of the EMAs to confirm momentum strength for a move toward the 87.45 target.
Reason: Bullish momentum indicators across both charts suggest upside potential, though price location relative to EMAs and weak volume indicate a potential period of consolidation.
Where the charts agree
Both charts confirm a Bullish bias with Medium conviction.
Chart 1's bullish uptrend aligns with Chart 2's RSI staying in the 50-70 bullish momentum zone.
Chart 1's successful target booking (T1-T3) is supported by Chart 2's accelerating MACD momentum and bullish signal cross.
Where the charts disagree
Chart 1 identifies a 'Bullish uptrend' while Chart 2 notes price is currently 'below both EMAs'.
The LONG trade plan has already booked three targets, while the Liquidity Tracker shows a fresh bullish cross in the neutral zone.
87.45
TLT — Delta + Technical (click to expand)
Delta Configuration
Bias
Recent Signal
Volume Strength
Envelope Position
net bullish
▲ bullish triangle
weak
price mid-envelope
EMA (9 / 21)
EMA 9
EMA 21
Cross State
Price vs EMAs
85.90
85.82
bullish cross (EMA9 above EMA21)
price below both EMAs
RSI (14)
Current
Zone
Divergence
53.18
bullish momentum (50-70)
bullish divergence
MACD (12, 26, 9)
Histogram
Signal Cross
Momentum
contracting green
bullish (MACD above signal)
accelerating up
Confluence
Indicators Aligned
Dominant Direction
3 bullish / 1 bearish
bullish
Outlook
Bias
Conviction
Reason
Key Level
Bullish
medium
Bullish delta signals and RSI bullish divergence are supported by a MACD crossover, though price remains below the EMAs.
85.90
* **Status:** The Primary Hedge.
* **Analysis:** Price $85.65. TLT is acting as the classic safe-haven, but with a twist. The "Volatility-Yield" divergence is the risk here: if the carry trade collapse is severe enough to force liquidation of sovereign holdings to meet margin calls, TLT will spike in volatility (UVXY) while selling off in price.
* **Trade:** Long TLT as a hedge, but monitor the Volatility-Yield divergence closely. If TLT breaks below $84.00, the "safe haven" thesis is failing.
HYG (iShares iBoxx $ High Yield Corporate Bond ETF)
The consensus outlook for HYG is Bullish with Medium conviction. While Chart 1 — Signals + Liquidity confirms an active long position with three targets (T1-T3) already booked, Chart 2 — Delta + Technical provides structural support through a bullish EMA crossover and net bullish delta. However, both analyses highlight a localized loss of momentum, specifically through falling liquidity lines (Chart 1) and bearish RSI/decelerating MACD readings (Chart 2).
Consensus Verdict
Final Bias
Conviction
Key Action
Bullish
medium
Monitor for price to hold above the 79.75 EMA 21 (Chart 2) to maintain the trend, while watching for a momentum breakout above 81.44 (Chart 1) to confirm further upside.
Reason: The prevailing bullish trend supported by EMA and delta indicators remains intact, but momentum indicators suggest a period of consolidation or resistance before higher targets can be reached.
Where the charts agree
Both charts maintain a medium-conviction Bullish bias despite evidence of momentum decay.
Chart 1's successful execution of T1-T3 targets aligns with Chart 2's bullish EMA crossover and net bullish delta.
Momentum deceleration is confirmed by both: Chart 1's falling liquidity lines and Chart 2's bearish RSI and decelerating MACD momentum.
Where the charts disagree
(none)
Key Levels to Watch
79.64 — Stop Loss (Chart 1)
79.75 — EMA 21 (Chart 2)
81.44 — Key Level/T5 (Chart 1)
HYG — Signals + Liquidity (click to expand)
Trade Signal
Direction
Status
Trigger
T1
T2
T3
T4
T5
Stop
Booked
LONG
active, 3 targets booked
79.91
80.25
80.62
81.04
81.44
81.85
79.64
T1, T2, T3
Price Snapshot
Current Price
Change
Trend
79.84
+0.04 (+0.05%)
Reversing
Risk Reward
R:R to T1
R:R to Furthest Target
1.26
7.19
Liquidity Tracker
Background Zone
Fast Line
Slow Line
Cross Signal
Extreme Reading
Price Divergence
neutral amber
below zero, falling
above zero, falling
diverging
mid-range neutral
none
Outlook
Bias
Conviction
Reason
Key Level to Watch
Bullish
medium
The trade plan is active with 3 targets booked, but the Liquidity Tracker shows a neutral mid-range reading with falling momentum lines.
81.44
HYG — Delta + Technical (click to expand)
Delta Configuration
Bias
Recent Signal
Volume Strength
Envelope Position
net bullish
▲ bullish triangle
weak
price near upper envelope
EMA (9 / 21)
EMA 9
EMA 21
Cross State
Price vs EMAs
79.99
79.75
bullish cross (EMA9 above EMA21)
price between EMAs
RSI (14)
Current
Zone
Divergence
48.23
bearish momentum (30-50)
none
MACD (12, 26, 9)
Histogram
Signal Cross
Momentum
contracting green
bullish (MACD above signal)
decelerating up
Confluence
Indicators Aligned
Dominant Direction
3 bullish / 1 bearish
bullish
Outlook
Bias
Conviction
Reason
Key Level
Bullish
medium
Bullish delta signals and an EMA crossover are currently offset by a neutral/bearish RSI.
79.75
* **Status:** The Canary in the Coal Mine.
* **Analysis:** Price $79.90. The options activity suggests a market that is complacent about credit risk (tight spreads), but the L2/L3 analysis indicates that widening spreads are inevitable.
* **Trade:** The "Tech-Credit Feedback Loop" makes HYG the most important indicator for the sustainability of the equity rally. If HYG breaks the $79.50 support, the "growth" trade in tech is dead.
AUDUSD (The 'Double-Short')
Status: Bearish.
Analysis: As the "ATM" for the carry trade, AUDUSD is being liquidated to fund margin calls. It is the most exposed to the "Commodity-Currency Liquidity Trap."
Trade: Short on any rally. It is the cleanest way to play the global liquidity drain.
Historical Parallels
The current environment bears striking similarities to the 2007 Yen Carry Trade Unwind. In early 2007, the BoJ raised rates, causing a massive repatriation of capital that triggered a global liquidity crunch. The key difference today is the "AI-fueled high multiples" in the tech sector. In 2007, the unwinding hit financials; today, it is hitting the high-multiple growth stocks (XLK). The outcome is likely to be similar: a short-term, violent correction followed by a complete re-rating of risk assets.
Outlook & Risk Matrix
Short-Term (1-5 Days)
Focus: Liquidity and margin calls.
Expectation: High volatility in USDJPY and EURJPY. Continued selling pressure in AUDUSD and XLK.
Key Levels:
XLK: Watch $190 support. A break here confirms the liquidity drain.
USDJPY: Any move toward 148-150 will trigger further intervention threats.
TLT: Watch for $85.00 support.
Medium-Term (1-4 Weeks)
Focus: Credit spread widening and growth expectations.
Expectation: The "Tech-Credit Feedback Loop" will take hold. If HYG spreads widen significantly, expect a permanent valuation reset in growth sectors.
Scenarios:
Base Case: A controlled unwind where the BoJ manages the JPY appreciation, leading to a 5-8% correction in equities and a rotation into defensive assets (GLD, TLT).
Bear Case (The 'Sudden Stop'): The MoF intervention triggers a global liquidity vacuum. Equities enter a 10%+ correction, AUDUSD collapses, and we see a "cash-is-king" environment where even safe havens like GLD sell off due to margin calls.
Bull Case (Unlikely): The carry trade stabilizes, and the "Defensive Importer" paradox allows Japanese domestic stocks to lead a recovery.
What to Watch (The Daily Pulse)
The 'Carry-Trade-Killer' (USDCHF): Watch for rapid, erratic moves. If it decouples from DXY, it confirms a systemic scramble for funding currency.
HYG Spreads: If the spread between HYG and LQD widens, the "growth" narrative is over.
AUDUSD Liquidity: If this pair breaks $0.64 (hypothetical, monitor actuals), it signals the "Double-Short" liquidity trap is in full effect.
MoF Rhetoric: Any comment on "orderly markets" is code for "we are watching, but we are scared." Any comment on "appropriate levels" is code for "we are about to intervene."
Education and market research only, not financial advice. Charts are OCS AI Trader readings at the time of writing and change with new bars.