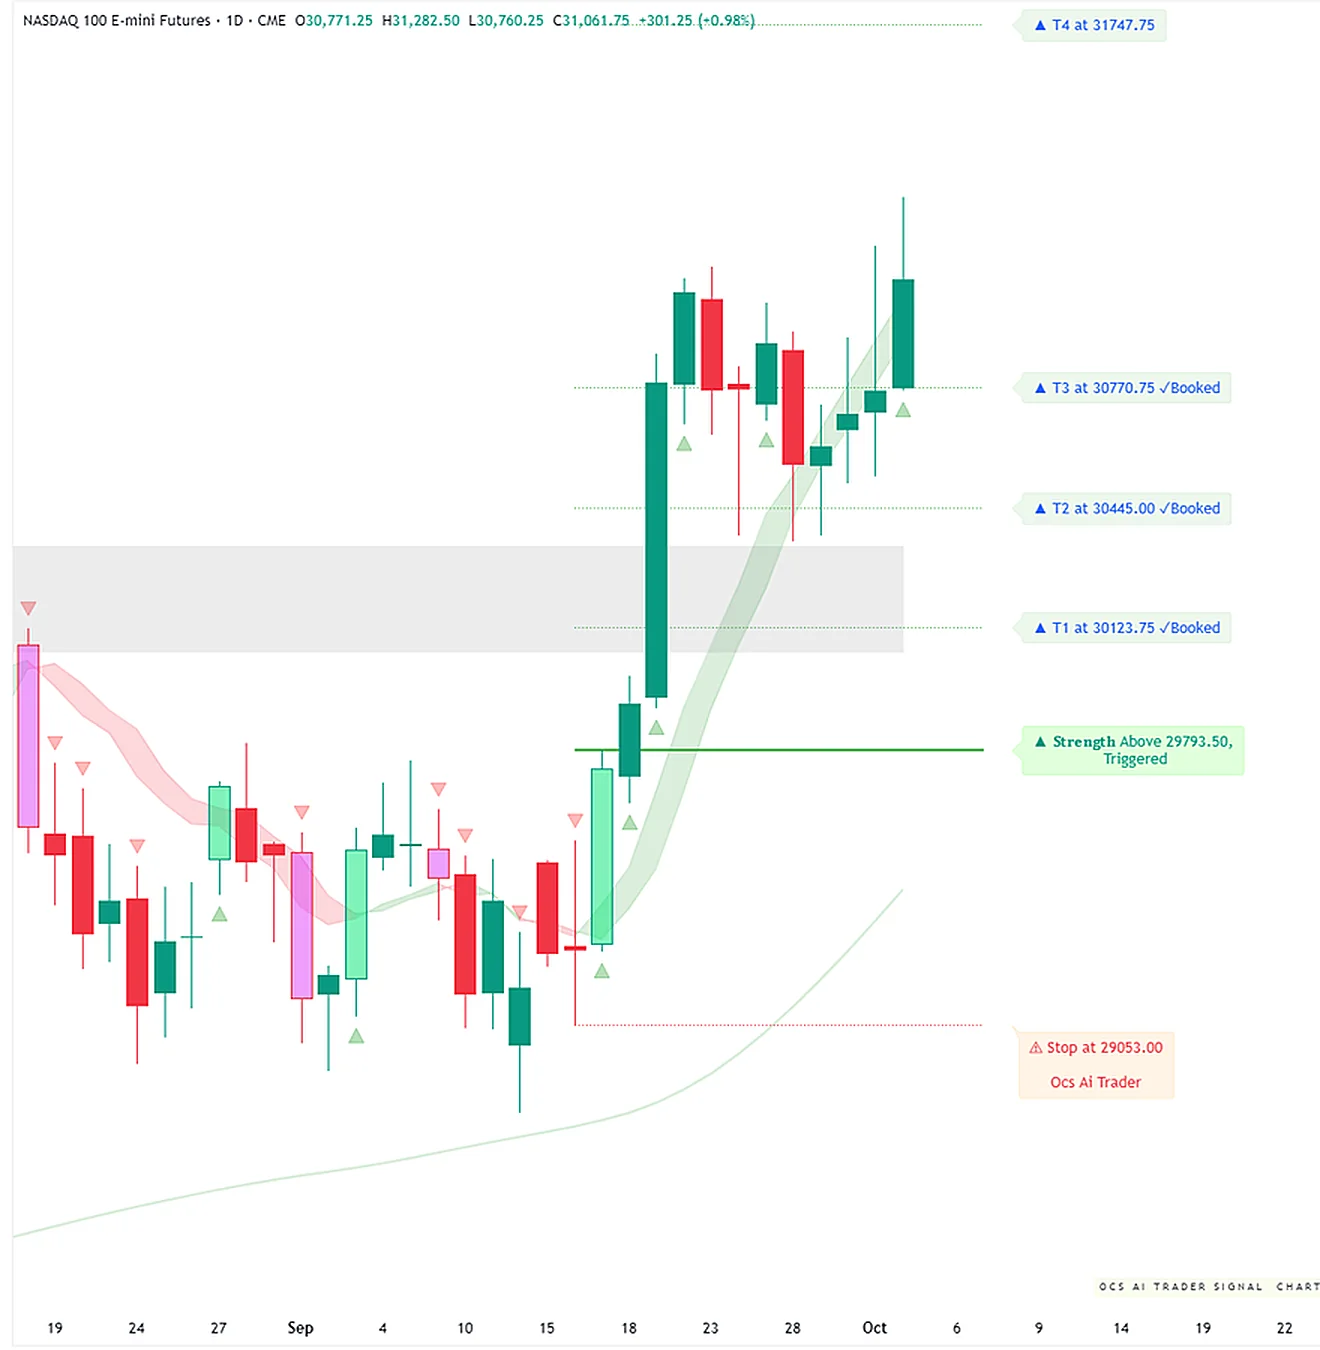
The Intervention Feedback Loop: JPY Volatility and the 'Clean' Haven Migration
The global macro landscape has shifted violently as the Japanese Ministry of Finance (MoF) deployed a suspected $63 billion USD "bazooka" to arrest the Yen’s slide. This intervention has not merely impacted the USDJPY pair; it has triggered a systemic liquidation of US Treasuries, a forced unwinding of the global carry trade, and a rare correlation break that is redefining the "safe-haven" hierarchy.
As G7 finance chiefs scramble to address global imbalances, the market is grappling with a "polluted" haven environment. Traditional anchors like the USD and JPY are currently compromised by active intervention and carry-trade volatility, forcing capital into "clean" alternatives—the Swiss Franc (CHF) and Gold.
Executive Summary: The $63 Billion Liquidity Shock
Today’s price action is dominated by the MoF’s direct market entry. By selling US Treasuries to source the USD required for Yen support, Japan has inadvertently exported volatility into the US rates market. This has pushed the 10-year yield higher, creating a "stagflationary pincer" for growth equities while simultaneously crushing high-beta FX plays like AUDUSD and NZDUSD. We are witnessing a transition from a "yield-seeking" regime to a "liquidity-preservation" regime, where the primary concern is no longer the carry, but the return of capital.
Layer 1: Direct Impacts — The MoF Bazooka and Geopolitical Noise
The primary catalyst is the direct upward pressure on JPY via MoF intervention. This move was designed to defend the 150.00-152.00 USDJPY corridor, which has become a line in the sand for Japanese policy-makers.
USDJPY & FXY: The massive USD selling has forced USDJPY off its recent highs, though the move is being met with significant "buy the dip" interest from macro funds betting on the BoJ’s continued hesitation to hike rates.
Safe-Haven Inflows: Geopolitical tensions remain a secondary but potent driver. Conflicting reports regarding US-Iran sanction relief and continued friction in the Strait of Hormuz have bolstered GLD ($418.43) and USDCHF.
Commodity Divergence: While oil (USO) remains volatile on geopolitical headlines, Copper (COPX) has slumped 1.44% to $81.85. This suggests the market is beginning to price in a global industrial slowdown, even as energy prices remain sticky.
Layer 2: Secondary Effects — The Carry Trade Carnage
The sudden appreciation of the Yen is the "death knell" for the carry trade. Because the Yen has served as the world’s primary funding currency, any sharp move higher triggers a mechanical deleveraging process.
Forced Unwinding (AUDUSD, NZDUSD): Investors who borrowed JPY to buy high-yielding Aussie or Kiwi dollars are facing margin calls. This has created a liquidity vacuum in AUDUSD and NZDUSD, as these pairs are liquidated to cover Yen liabilities.
Treasury Yield Pressure: To fund the $63 billion intervention, the MoF must liquidate US Treasury holdings. This increases the supply of bonds, driving TLT prices down (currently $83.56, RSI 30.5) and yields higher.
Japanese Exporter Compression: A stronger Yen is a direct headwind for the Nikkei’s heavyweights. We are seeing margin compression expectations for Toyota and Sony, as their overseas earnings lose value upon repatriation.
Layer 3: Macro Propagation — The Yield-Growth Pincer
The ripple effects of MoF intervention are now hitting the core of the US equity market. The liquidation of Treasuries is not a localized event; it is a global repricing of the risk-free rate.
Tech De-Rating (XLK): As the MoF drives US yields higher, the discount rate for future earnings rises. This is hitting long-duration assets like XLK ($174.36) and NVDA. The sector is seeing a rotation out of high-multiple "AI darlings" and into defensive value.
EM "Triple-Whammy": Emerging markets are facing a perfect storm. The Yen carry trade is collapsing, industrial demand (Copper) is falling, and USD funding costs are rising due to higher UST yields. This is particularly evident in the Mexican Peso (USDMXN), which is acting as a high-beta proxy for global risk.
G10 Volatility Spillover: The intervention in USDJPY has created imbalances in EURJPY and GBPJPY. Algorithmic traders are sourcing liquidity in EURUSD (testing 1.08) and GBPUSD (testing 1.25) to balance their Yen-cross exposures, spreading the volatility across the entire G10 complex.
Layer 4: Non-Obvious Connections — The "Clean" Haven Migration
This is where the alpha lies. Most analysts view the USD and JPY as safe havens. However, today’s data suggests a correlation break.
The Polluted Haven Paradox: Usually, when geopolitical risk spikes, investors buy USD and JPY. But today, the MoF is selling USD, and the JPY is the source of carry-trade instability. This makes both "polluted." Consequently, capital is bypassing them for Gold (GLD) and the Swiss Franc (USDCHF). These are the only "clean" havens left, leading to a rare scenario where USDJPY falls while GLD and USDCHF rise in tandem.
The Intervention Feedback Loop: The MoF sells Treasuries to buy Yen. This spikes US yields. Higher US yields attract capital back into the USD, neutralizing the MoF’s intervention. This "Sisyphus effect" suggests that unless the Bank of Japan (BoJ) follows up with a rate hike, the MoF is simply subsidizing USD buyers at a higher yield.
Japanese Financials vs. Exporters: While the stronger Yen hurts exporters (DXJ), the spike in global yields—driven by MoF bond selling—is a massive tailwind for Japanese mega-banks (e.g., Mitsubishi UFJ). A long Banks/short Exporters trade is the sophisticated way to play Yen volatility without directional currency risk.
Security-by-Security Analysis
EURUSD
Price: Testing 1.0800
Causal Chain: Acting as a secondary liquidity source for Yen-cross rebalancing. The pair is caught between a softening Eurozone outlook and the USD strength generated by rising UST yields.
Technical: Key support at 1.0750. Resistance at 1.0880.
The consensus direction is Neutral with low conviction due to a complete absence of actionable data. Both Chart 1 — Signals + Liquidity and Chart 2 — Delta + Technical report a failure to load the USDJPY symbol, resulting in null values for all signals, liquidity trackers, and technical indicators.
Consensus Verdict
Final Bias
Conviction
Key Action
Neutral
low
Wait for the restoration of valid symbol data and the emergence of visible technical indicators before considering any market entry.
Reason: Both analyses are invalidated by a technical error indicating the symbol does not exist, preventing any meaningful technical or liquidity evaluation.
Where the charts agree
Both Chart 1 — Signals + Liquidity and Chart 2 — Delta + Technical report a Neutral bias with low conviction.
Both analysts report that technical data is unavailable due to a system error stating 'This symbol doesn't exist'.
Where the charts disagree
(none)
Key Levels to Watch
(none)
USDJPY — Signals + Liquidity (click to expand)
Trade Signal
Direction
Status
Trigger
T1
T2
T3
T4
T5
Stop
Booked
NEUTRAL
unclear
N/A
N/A
N/A
N/A
N/A
N/A
N/A
None
Price Snapshot
Current Price
Change
Trend
N/A
N/A
N/A
Risk Reward
R:R to T1
R:R to Furthest Target
N/A
N/A
Liquidity Tracker
Background Zone
Fast Line
Slow Line
Cross Signal
Extreme Reading
Price Divergence
N/A
N/A
N/A
none
N/A
none
Outlook
Bias
Conviction
Reason
Key Level to Watch
Neutral
low
No data is available in the Signals trade plan or the Liquidity Tracker because the symbol does not exist.
N/A
USDJPY — Delta + Technical (click to expand)
Delta Configuration
Bias
Recent Signal
Volume Strength
Envelope Position
N/A
none visible
N/A
N/A
EMA (9 / 21)
EMA 9
EMA 21
Cross State
Price vs EMAs
N/A
N/A
N/A
N/A
RSI (14)
Current
Zone
Divergence
N/A
N/A
N/A
MACD (12, 26, 9)
Histogram
Signal Cross
Momentum
N/A
N/A
N/A
Confluence
Indicators Aligned
Dominant Direction
mixed
N/A
Outlook
Bias
Conviction
Reason
Key Level
Neutral
low
The chart displays an error message stating 'This symbol doesn't exist', so no technical data is available for analysis.
N/A
* **Price:** Volatile around 150.00
* **Causal Chain:** Direct target of MoF intervention. The "line in the sand" is being defended with $63bn in ammunition.
* **Outlook:** Bearish short-term on intervention risk; Bullish medium-term as long as the BoJ maintains a wide rate differential with the Fed.
The outlook for AUDUSD is Bullish, though conviction is tempered by conflicting liquidity signals. While Chart 2 — Delta + Technical reports high conviction with strong alignment across EMA, RSI, and MACD, Chart 1 — Signals + Liquidity identifies a bearish cross in the liquidity tracker that suggests potential momentum exhaustion despite the current uptrend.
Consensus Verdict
Final Bias
Conviction
Key Action
Bullish
medium
Monitor for price support at the EMA21 (Chart 2 — Delta + Technical) while watching for further liquidity decay as signaled in Chart 1 — Signals + Liquidity.
Reason: Strong technical momentum and indicator confluence are present, but a bearish liquidity signal in Chart 1 suggests the current move may face resistance or exhaustion.
Where the charts agree
Chart 1 — Signals + Liquidity bullish uptrend is corroborated by the bullish alignment of all four technical indicators in Chart 2 — Delta + Technical.
The active long position in Chart 1 — Signals + Liquidity (T1 and T2 targets booked) aligns with the accelerating upward momentum seen in the MACD and RSI in Chart 2 — Delta + Technical.
Where the charts disagree
Chart 1 — Signals + Liquidity shows a bearish liquidity cross with the fast line falling below zero, whereas Chart 2 — Delta + Technical maintains high bullish conviction via EMA and MACD alignment.
Key Levels to Watch
0.72350 — Current Price/T5 (Chart 1 — Signals + Liquidity)
EMA21 — Dynamic Support (Chart 2 — Delta + Technical)
0.71430 — Stop Loss (Chart 1 — Signals + Liquidity)
AUDUSD — Signals + Liquidity (click to expand)
Trade Signal
Direction
Status
Trigger
T1
T2
T3
T4
T5
Stop
Booked
LONG
active, 2 targets booked
0.71530
0.71640
0.71760
0.71910
0.72080
0.72350
0.71430
T1, T2
Price Snapshot
Current Price
Change
Trend
0.72350
-0.00078 (-0.11%)
Bullish uptrend
Risk Reward
R:R to T1
R:R to Furthest Target
1.10
8.20
Liquidity Tracker
Background Zone
Fast Line
Slow Line
Cross Signal
Extreme Reading
Price Divergence
neutral amber
below zero, falling
near zero, flat
fast crossed below slow
mid-range neutral
none
Outlook
Bias
Conviction
Reason
Key Level to Watch
Bullish
medium
The trade plan is active with T1 and T2 targets booked, but the Liquidity Tracker shows a bearish cross in the neutral zone.
0.72350
AUDUSD — Delta + Technical (click to expand)
Delta Configuration
Bias
Recent Signal
Volume Strength
Envelope Position
net bullish
▲ bullish triangle
weak
price near upper envelope
EMA (9 / 21)
EMA 9
EMA 21
Cross State
Price vs EMAs
N/A
N/A
bullish cross (EMA9 above EMA21)
price above both EMAs
RSI (14)
Current
Zone
Divergence
58.14
bullish momentum (50-70)
none
MACD (12, 26, 9)
Histogram
Signal Cross
Momentum
expanding green
bullish (MACD above signal)
accelerating up
Confluence
Indicators Aligned
Dominant Direction
all 4 bullish
bullish
Outlook
Bias
Conviction
Reason
Key Level
Bullish
high
Strong bullish alignment across Delta, EMA, RSI, and MACD indicators with accelerating momentum.
EMA21 support
* **Price:** Under pressure
* **Causal Chain:** The primary victim of the carry-trade unwind. As JPY strengthens, AUD is sold aggressively to cover funding gaps.
* **Technical:** Watching 0.6550 support.
The unified outlook for FXY is Bearish with Medium conviction. While previous long targets have been met, both analyses suggest immediate downside pressure: 'Chart 1 — Signals + Liquidity' notes a bearish downtrend with price retracing toward the trigger level, and 'Chart 2 — Delta + Technical' confirms this via a bearish MACD cross and price action sitting below both the EMA 9 and EMA 21.
Consensus Verdict
Final Bias
Conviction
Key Action
Bearish
medium
Monitor the 57.55 support level from 'Chart 1 — Signals + Liquidity'; a break below this could validate the bearish MACD momentum observed in 'Chart 2 — Delta + Technical'.
Reason: Price is retracing through key moving averages and liquidity zones following the exhaustion of previous long targets.
Where the charts agree
Both 'Chart 1 — Signals + Liquidity' and 'Chart 2 — Delta + Technical' identify a bearish bias with medium conviction.
The bearish downtrend noted in 'Chart 1 — Signals + Liquidity' aligns with the bearish MACD signal cross and price trading below EMAs in 'Chart 2 — Delta + Technical'.
Negative momentum in the 'Chart 1 — Signals + Liquidity' Liquidity Tracker (below zero, falling) is supported by the net bearish Delta in 'Chart 2 — Delta + Technical'.
Where the charts disagree
The RSI in 'Chart 2 — Delta + Technical' shows bullish momentum (54.45), which contrasts with the bearish downtrend and red liquidity zone described in 'Chart 1 — Signals + Liquidity'.
Key Levels to Watch
57.80 — Current Price
57.73 — EMA 21 (Chart 2)
57.55 — Trigger Level (Chart 1)
56.85 — Stop Loss (Chart 1)
FXY — Signals + Liquidity (click to expand)
Trade Signal
Direction
Status
Trigger
T1
T2
T3
T4
T5
Stop
Booked
LONG
active, 4 targets booked
57.55
58.30
58.80
59.45
59.13
61.075
56.85
T1, T2, T3, T4
Price Snapshot
Current Price
Change
Trend
57.80
(-0.09%)
Bearish downtrend
Risk Reward
R:R to T1
R:R to Furthest Target
1.07
5.04
Liquidity Tracker
Background Zone
Fast Line
Slow Line
Cross Signal
Extreme Reading
Price Divergence
bearish red
below zero, falling
below zero, falling
none
near -2 oversold
none
Outlook
Bias
Conviction
Reason
Key Level to Watch
Bearish
medium
While several targets have been booked, the price is currently retracing toward the trigger level while the Liquidity Tracker shows bearish momentum in the red zone.
57.55
FXY — Delta + Technical (click to expand)
Delta Configuration
Bias
Recent Signal
Volume Strength
Envelope Position
net bearish
▼ bearish triangle
moderate
price near lower envelope
EMA (9 / 21)
EMA 9
EMA 21
Cross State
Price vs EMAs
58.94
57.73
bullish cross (EMA9 above EMA21)
price below both EMAs
RSI (14)
Current
Zone
Divergence
54.45
bullish momentum (50-70)
none
MACD (12, 26, 9)
Histogram
Signal Cross
Momentum
contracting red
bearish (MACD below signal)
accelerating down
Confluence
Indicators Aligned
Dominant Direction
3 bearish / 1 bullish
bearish
Outlook
Bias
Conviction
Reason
Key Level
Bearish
medium
Price has broken below both EMA 9 and EMA 21, coinciding with a bearish MACD crossover.
57.73
* **Price:** $57.80 (-0.09%)
* **Technicals:** RSI at 44.78. MACD shows a slight bullish divergence.
* **Options:** High volume in the June $58 Calls (1,763 vol) suggests traders are betting on continued intervention success in the short term.
The consensus direction for TLT is Bearish, though conviction is moderated by extreme oversold readings. Chart 1 — Signals + Liquidity shows an active short trade with four targets already booked and high conviction, while Chart 2 — Delta + Technical confirms the bearish bias through net bearish delta and contracting MACD momentum.
Consensus Verdict
Final Bias
Conviction
Key Action
Bearish
medium
Monitor the 84.70 level for further downside, but exercise caution due to the oversold readings noted in both Chart 1 and Chart 2.
Reason: While liquidity and momentum indicators across both charts confirm a dominant bearish trend, the bullish EMA cross in Chart 2 and near-oversold readings suggest potential for a trend exhaustion or mean reversion.
Where the charts agree
Strong bearish momentum alignment: Chart 1 reports a bearish red liquidity zone while Chart 2 confirms bearish RSI and MACD momentum.
Oversold/Extreme territory: Chart 1 notes an extreme reading near -2, which aligns with Chart 2's RSI being at 30.71 near the lower volatility envelope.
Where the charts disagree
Trend signal conflict: Chart 1 identifies a bearish downtrend, whereas Chart 2 shows a bullish EMA 9/21 cross.
Price level discrepancy: Chart 1 prices the asset at 85.06, while Chart 2 focuses on EMAs in the 93.00 range.
Key Levels to Watch
84.70 — T5 Target (Chart 1)
85.06 — Current Price (Chart 1)
93.32 — EMA21 (Chart 2)
TLT — Signals + Liquidity (click to expand)
Trade Signal
Direction
Status
Trigger
T1
T2
T3
T4
T5
Stop
Booked
SHORT
active, 4 targets booked
88.30
88.30
87.40
86.50
85.60
84.70
89.35
T1, T2, T3, T4
Price Snapshot
Current Price
Change
Trend
85.06
-0.10 (-0.12%)
Bearish downtrend
Risk Reward
R:R to T1
R:R to Furthest Target
0.00
3.43
Liquidity Tracker
Background Zone
Fast Line
Slow Line
Cross Signal
Extreme Reading
Price Divergence
bearish red
below zero, falling
below zero, falling
fast crossed below slow
near -2 oversold
none
Outlook
Bias
Conviction
Reason
Key Level to Watch
Bearish
high
The short signal is active with four targets booked as price trends towards T5, coinciding with the oscillator sitting in the bearish red zone.
84.70
TLT — Delta + Technical (click to expand)
Delta Configuration
Bias
Recent Signal
Volume Strength
Envelope Position
net bearish
▼ bearish triangle
weak
price near lower envelope
EMA (9 / 21)
EMA 9
EMA 21
Cross State
Price vs EMAs
93.70
93.32
bullish cross (EMA9 above EMA21)
price between EMAs
RSI (14)
Current
Zone
Divergence
30.71
bearish momentum (30-50)
none
MACD (12, 26, 9)
Histogram
Signal Cross
Momentum
contracting red
bearish (MACD below signal)
decelerating down
Confluence
Indicators Aligned
Dominant Direction
3 bearish / 1 bullish
bearish
Outlook
Bias
Conviction
Reason
Key Level
Bearish
medium
Price is trending at the lower volatility envelope with bearish delta signals and contracting bearish MACD momentum.
93.32 (EMA21)
* **Price:** $83.56 (-0.12%)
* **Technicals:** Deeply oversold (RSI 30.5). Price is hugging the lower Bollinger Band ($83.82).
* **Causal Chain:** Downward pressure from MoF reserve liquidation.
* **Observation:** The massive volume in $83.50 Puts (8,261) suggests the market expects the floor to drop further if Japan continues selling.
GLD presents a highly conflicted outlook with a Neutral bias due to fundamentally opposing momentum signals. Chart 1 — Signals + Liquidity indicates high-conviction bearishness with a confirmed downtrend and two targets already booked, while Chart 2 — Delta + Technical suggests a medium-conviction bullish trend supported by positive RSI and EMA alignment.
Consensus Verdict
Final Bias
Conviction
Key Action
Neutral
low
Observe if price can hold above the EMA 21 (Chart 2) to validate a reversal, or if a breakdown below the T3 level (Chart 1) confirms the bearish continuation.
Reason: The high-conviction bearish trend and liquidity exhaustion from Chart 1 are in direct contradiction with the bullish EMA cross and RSI momentum reported in Chart 2.
Where the charts agree
Both charts focus on the immediate price action between 418.00 and 425.00.
Where the charts disagree
Trend Direction: Chart 1 — Signals + Liquidity identifies a bearish downtrend, while Chart 2 — Delta + Technical shows a bullish EMA cross (EMA9 > EMA21).
Price Position: Chart 1 — Signals + Liquidity places price at 418.43, contradicting the assertion in Chart 2 — Delta + Technical that price is trading above both EMAs (425.26 and 419.83).
Key Levels to Watch
418.45 — T3 Target (Chart 1)
419.83 — EMA 21 (Chart 2)
425.26 — EMA 9 (Chart 2)
440.00 — Stop (Chart 1)
GLD — Signals + Liquidity (click to expand)
Trade Signal
Direction
Status
Trigger
T1
T2
T3
T4
T5
Stop
Booked
SHORT
active, 2 targets booked
436.02
433.45
431.08
418.45
N/A
N/A
440.00
T1, T2
Price Snapshot
Current Price
Change
Trend
418.43
+1.14 (+0.27%)
Bearish downtrend
Risk Reward
R:R to T1
R:R to Furthest Target
to_furthest": 4.41 0.65 4.41
to_t1": 0.65 4.41 4.41
Liquidity Tracker
Background Zone
Fast Line
Slow Line
Cross Signal
Extreme Reading
Price Divergence
bearish red
below zero, falling
below zero, falling
none
near -2 oversold
none
Outlook
Bias
Conviction
Reason
Key Level to Watch
Bearish
high
The short trade plan has already booked two targets, and the Liquidity Tracker is currently in the bearish red zone.
418.45
GLD — Delta + Technical (click to expand)
Delta Configuration
Bias
Recent Signal
Volume Strength
Envelope Position
balanced
mixed
weak
price mid-envelope
EMA (9 / 21)
EMA 9
EMA 21
Cross State
Price vs EMAs
425.26
419.83
bullish cross (EMA9 above EMA21)
price above both EMAs
RSI (14)
Current
Zone
Divergence
57.73
bullish momentum (50-70)
none
MACD (12, 26, 9)
Histogram
Signal Cross
Momentum
contracting green
bullish (MACD above signal)
decelerating up
Confluence
Indicators Aligned
Dominant Direction
3 bullish / 1 bearish
bullish
Outlook
Bias
Conviction
Reason
Key Level
Bullish
medium
Price is trending above key EMAs with bullish RSI and MACD, though momentum is beginning to decelerate.
425.26
* **Price:** $418.43 (+0.27%)
* **Causal Chain:** Beneficiary of the "Clean Haven" migration. Bypassing USD/JPY volatility.
* **Technical:** Holding the $413 lower Bollinger support. Resistance at $425.
XLK (Technology Select Sector SPDR)
Price: $174.36 (-1.08%)
Causal Chain: Duration compression. Rising yields (from MoF bond sales) are forcing a re-valuation of tech multiples.
Technical: RSI 68.22—still near overbought territory despite today's drop. More room for a "mean reversion" sell-off.
Historical Parallels
This setup mirrors the September 2022 JPY intervention. At that time, the MoF's entry initially failed to sustain Yen strength because the Fed was still aggressively hiking. It wasn't until US yields peaked that the Yen found a true floor. We are currently in a "rhyme" of that period, where the MoF is fighting a tide that only the BoJ (via rates) or the Fed (via pivots) can truly turn.
Outlook & Risk Matrix
Scenario
FX Impact
Equity/Bond Impact
Probability
Base Case
USDJPY stabilizes at 148-150; Carry unwind continues.
Yields stay elevated; Tech remains under pressure.
60%
Bull Case (BoJ Pivot)
JPY surges; USDJPY breaks 145.
Massive global de-leveraging; SPY/QQQ correction of 5-10%.
25%
Bear Case (Intervention Failure)
USDJPY rockets to 155; DXY surges.
US yields spike to new highs; TLT breaks $80.
15%
Short-term (1-5 days): Expect extreme volatility in Yen crosses. The 150.00 level in USDJPY will be a battleground. Watch for a bounce in TLT as it is technically "stretched" to the downside.
Medium-term (1-4 weeks): The focus will shift to the incoming Fed Chair (Warsh) and his stance on inflation. If the market perceives a more hawkish Fed, the MoF's $63 billion will have been spent in vain.
What to Watch
US 10-Year Yields: If they break 4.75%, the MoF intervention is effectively being "overpowered" by the market.
USDCHF Performance: If it continues to decouple from USDJPY, the "Clean Haven" thesis is confirmed.
NVDA Earnings/Guidance: As the "AI Dark Horse" rotation begins, any weakness in the leader could accelerate the XLK de-rating.
BoJ Rhetoric: Any hint of an unscheduled rate meeting will turn the JPY carry unwind into a stampede.
Education and market research only, not financial advice. Charts are OCS AI Trader readings at the time of writing and change with new bars.